 SAME DAY & EXPEDITED SHIPPING AVAILABLE






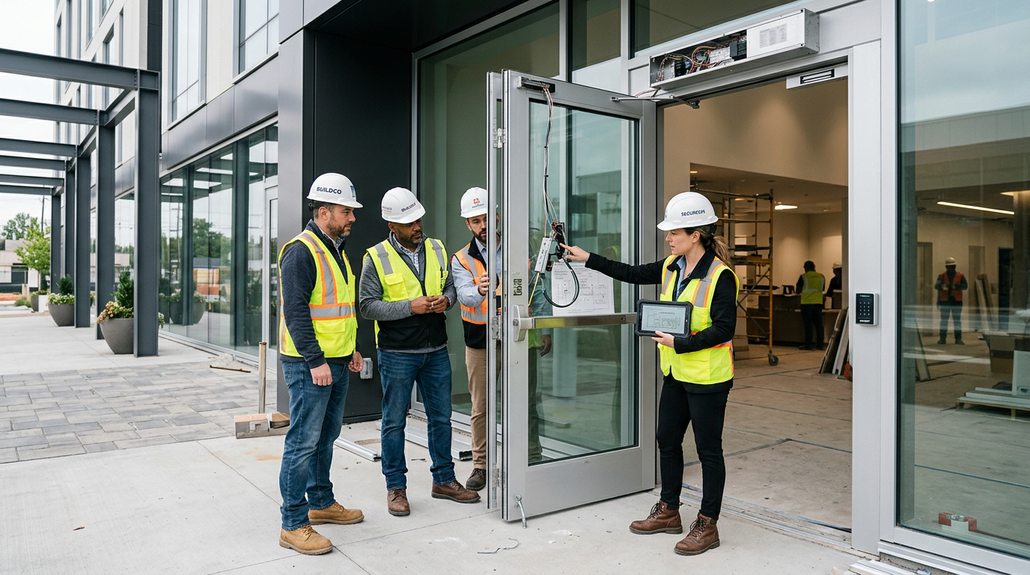
How to Coordinate a Complete Electrified Opening
Posted by National Lock Supply on May 4th 2026
A typical electrified commercial opening carries five devices that have to coexist: a door closer, an exit device, an electric strike (or a maglock), a request-to-exit signal, and a regulated power supply. The order they get specified matters. Closer sizing dictates door speed and force, exit device type fixes the strike geometry, the strike fixes the amperage draw, the REX fixes the bypass logic, and the power supply has to absorb the whole stack with 25% headroom. Get the order right and the opening is silent, code-compliant, and lasts 15 years. Get it wrong and the closer slams the door before the strike latches.
The five devices that need to talk to each other
Every electrified opening on a commercial building has the same physical stack. The components vary in model, but the orchestration logic does not.
- Door closer: regulates the closing speed, sweep, latch, and back-check. Sizing depends on door width, weight, and pressure differential.
- Exit device: panic bar (rim, surface vertical rod, concealed vertical rod, or mortise) that allows free egress. Required on rated egress openings.
- Electric strike or maglock: the locking element that the access control system controls. Fail-safe (unlocks on power loss) or fail-secure (stays locked on power loss).
- Request-to-exit (REX): a passive (PIR) or active (push bar microswitch) signal that bypasses the door-forced-open alarm when someone exits.
- Power supply: regulated, with battery backup if the opening is on a life-safety circuit. Sized to feed the strike, the REX, and any auxiliary outputs.
Specify in this order. Closer first, exit device second, strike third, REX fourth, power supply last. Pick the strike before the exit device and you will end up with a strike that does not match the latchbolt profile of the panic.
Step 1: Size the closer before anything else
Door closers carry a BHMA A156.4 grade and a size class (1 through 6). Size 6 covers heaviest doors, size 1 lightest. ADA compliance caps the opening force at 5 lbf for interior non-fire-rated doors, which usually narrows the choice to a size 1–3 closer with adjustable spring.
The closer fixes the geometry of the strike pocket because of how the door travels. A spring-loaded closer that closes too fast will hit the strike before the latch retracts cleanly. This is the #1 cause of strike chatter on a freshly commissioned opening. Read how to choose a commercial door closer for the sizing math.
For ADA-compliant openings, the LCN 4011 and Norton 1601 BF are the two surface closers most specifiers default to. Both meet 5 lbf at the latch.
Step 2: Pick the exit device that matches the strike geometry
An exit device determines the latch type and position, and that determines which strike you can put across from it.
- Rim exit device: latch on the door edge, mates with a surface or recessed rim strike. Easiest to electrify. Most common on single doors.
- SVR (surface vertical rod): top and bottom latches. Pairs with a top strike and a floor strike. Used on double doors with no astragal.
- CVR (concealed vertical rod): same logic as SVR but rods are concealed in the door. Cleaner look, more service-intensive.
- Mortise exit device: mortise lock body integrated with the panic. Pairs with a mortise strike. Used on heavy-traffic openings.
If the spec calls for an electric strike, the exit device must be a rim or mortise type. Vertical rod devices do not pair with rim strikes. Read exit device types: rim vs SVR vs mortise vs CVR for the trade-off matrix.
Step 3: Electric strike vs maglock, and the amperage budget
For most rim panic openings, an electric strike beats a maglock. Maglocks require a release sensor and a delayed egress configuration to be code-compliant in many jurisdictions, while an electric strike releases mechanically when the panic bar is pushed, which keeps the opening code-clean.
The trade-off is amperage. A typical 12VDC electric strike draws 200-300mA holding, with an inrush spike up to 1A. A 24VDC maglock draws 250-500mA continuous. Multiply by the number of openings on one power supply and add 25% headroom.
For the strike side, how to choose an electric strike walks the spec process and electric strike vs maglock detailed comparison covers the code logic that drives the choice.
Choose fail-secure for perimeter and tenant doors (lose power, stay locked). Choose fail-safe for stair doors and life-safety egress (lose power, unlock). Mixing them on the same building is normal and expected.
Step 4: REX integration and bypass logic
A request-to-exit device tells the access control system "this is a legitimate exit, do not alarm". Without it, every panic bar press triggers a door-forced-open event.
Two REX types:
- PIR REX: passive infrared mounted above the door, fires on motion. Simple wiring (2 conductors back to the panel).
- Mechanical REX: a microswitch built into the panic bar or mortise lock. More reliable, requires a panic with REX option (e.g. Von Duprin 99-EL with RX).
The REX output is dry-contact, normally open or normally closed depending on panel preference. Most integrators wire it to bypass the DPS (door position switch) for 5-15 seconds. Read how to choose a request-to-exit device REX for wiring detail.
Step 5: Power supply sizing
The power supply sits at the end of the spec because it has to absorb everything upstream.
Math for a single rim panic opening with electric strike, PIR REX, and DPS:
- Electric strike holding: 300mA
- Strike inrush (peak): 1A
- PIR REX: 30mA
- DPS: 0mA (dry contact)
- Total continuous: 330mA
- Total inrush: 1.03A
A 12VDC 2A power supply with 1A battery backup covers this opening with 5x headroom for surges and future devices. For multi-door openings, run the same math per door and aggregate.
The power supply should be a regulated, low-voltage UL 294 listed unit. Read how to choose an access control power supply for spec criteria.
Common installer mistakes that kill an opening
- Closer sized for the door but not for the pressure differential. Stairwells with stack effect need 1-2 sizes larger. The opening fails the latch test after commissioning.
- Strike inrush exceeds power supply current limit. The strike chatters or never fully unlocks. Diagnose with a clamp meter at the strike feed.
- REX timing too short. Tenant carrying a box trips the DFO alarm because they cleared the PIR cone before the door fully closed. Set REX bypass to 10-15 seconds minimum.
- Mixed fail-safe and fail-secure on the same panel without labeling. Maintenance team disables power for service and unintentionally locks tenants out (or props open the perimeter).
- No transient suppression on the strike line. Inductive kickback from the strike coil shortens the panel relay life. Add a diode across the strike coil.
Wiring sequence, top to bottom
A clean opening wires in this order:
- 120VAC line to power supply (electrician scope)
- Power supply to door panel (low voltage installer)
- Panel to electric strike via NO/NC relay
- Panel to PIR REX (or panic microswitch) on dedicated input
- Panel to DPS on dedicated input (latched)
- Panel to card reader on Wiegand or OSDP bus
The closer and exit device are mechanical and do not enter the wiring. They get specified, ordered, and installed in parallel.
When to switch to a maglock
Three cases where the opening should run a maglock instead of an electric strike:
- Aluminum storefront with thin stile: no room for a strike pocket.
- Glass door with no frame: maglock and a top-of-door bracket are the only option.
- Delayed egress required by occupancy type: maglock with built-in delay timer (15-second NFPA 101 compliant) is the cleanest install.
For storefront openings specifically, read how to choose storefront hardware for aluminum doors.
FAQ
Can I run multiple electric strikes off one power supply? Yes, within the current budget. A 4A power supply will run 6-8 typical strikes at 300mA continuous each. Add 25% headroom and confirm the inrush math.
Does the closer need a power transfer if I am electrifying the strike, not the lock? No. The closer is mechanical. Power transfer (electrified hinge or door loop) is only needed when the lock or panic itself is electrified, not the strike. Read electrified hinges vs door loops vs power transfer devices.
What is the difference between fail-safe and fail-secure for code compliance? Fail-safe unlocks on power loss, which life-safety code requires on stairwell re-entry and some egress paths. Fail-secure stays locked on power loss, used everywhere else. Code defaults: read how to choose an exit door alarm for the relevant occupancy classes.
Can I use a PIR REX with a panic bar? Yes, but it is redundant. If the panic bar has an integrated microswitch (RX option), use that. PIR REX is for openings without an exit device, like store entrances.
What size battery backup do I need? NFPA 101 requires a minimum of 90 minutes of standby for life-safety circuits. For non-life-safety access control, 4 hours is typical. Math: total amperage draw at standby × backup hours = battery Ah needed.
Next step
If you are specifying an electrified opening, start by pricing the closer and exit device from our door closers and panic exit devices categories, then size the strike from electric strikes. For the REX and power supply, our access control category covers the regulated supplies and motion sensors. If you want a spec review before placing an order, contact our commercial desk and send the door schedule.